Troubleshooting
Booting without signed drivers
If your machine cannot boot due to the virtio drivers installed during the automatic driver installation in the virtualization phase being unsigned or having an invalid signature for your operating system, the machine may enter a recovery boot loop. To address this issue, follow these steps:
1. Advanced options in the Automatic Repair boot screen: Press the “Advanced options” button.

Fig. 331 Advanced options in the Automatic Repair boot screen
2. Troubleshoot: Select the “Troubleshoot” option.

Fig. 332 Troubleshoot option
3. Advanced options: Choose the “Advanced options”.

Fig. 333 Choosing Advanced options
4. Startup Settings: Within the Advanced options, select the “Startup Settings” to change Windows startup behavior.
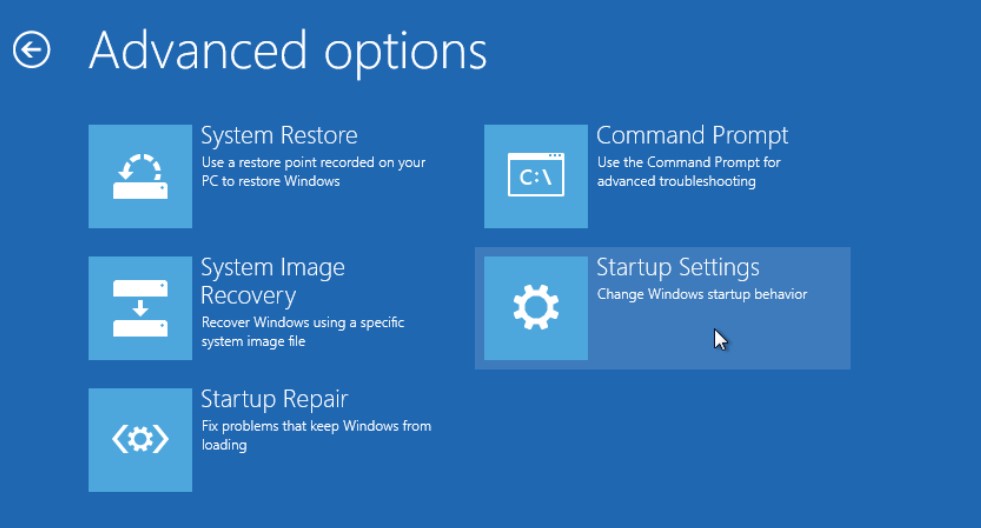
Fig. 334 Startup Settings option
5. Restart: Press the “Restart” button and await the system restart.

Fig. 335 Restart option
6. Press F7: Once the system restarts, press the F7 key to choose “Disable driver signature enforcement”.
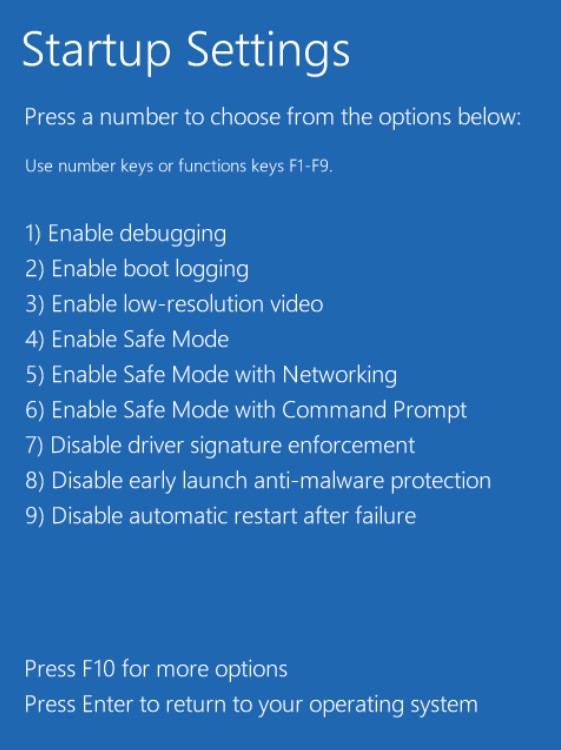
Fig. 336 Pressing F7 for Disable driver signature enforcement
7. Windows normal boot: Your Windows should now boot normally.

Fig. 337 Windows booting normally
Note
This behavior has been observed in older Windows versions, such as Windows 8.1. Mismatches or odd dates in the driver certificate can lead to this issue.
DEBUG: Remote ssh to folder
If you encounter issues with the forensicVM, you might need to directly edit its configuration files or control its state (start/stop). Below is a step-by-step guide on how to perform these actions:
In the Autopsy ForensicVM Client Plugin, select DEBUG: Remote ssh to folder.

Fig. 338 DEBUG: Remote ssh to folder option in the Autopsy ForensicVM Client Plugin.
Elevate to root permissions. Enter the su command and provide the root password when prompted.

Fig. 339 Elevating to root using the su command.
Input the following command to edit the configuration file associated with the forensicVM:
nano `ls *vnc*`

Fig. 340 Editing the forensicVM configuration file with nano.
Inside the editor, modify the configuration file as needed. Adjust the relevant parameters to your requirements.

Fig. 341 The configuration file open in nano for editing.
Once done, exit the remote shell. Now, you can start the forensicVM as you typically would.
Note
It’s essential to ensure that the configurations are correct to prevent any unexpected behaviors.
For advanced techniques and in-depth configurations for the forensicVM, consider referring to the official QEMU documentation: QEMU Documentation.