Convert Forensic Image to a Forensic Virtual Machine
When aiming to convert a local forensic image to a remote forensic virtual machine on a server, two primary methods are prevalent:
Direct Copy to Server: This approach duplicates the forensic image, creating a new forensic virtual machine on the server. It grants comprehensive access and utility of the forensicVM, making it the ideal choice for collaborative remote investigations.
Link Creation: In this method, a link is forged between the local forensic image and a new counterpart on the server. Although it’s swifter (given that the image isn’t transferred to the remote server), there are limitations. The conversion and previewing are quick, yet initiating the machine locally is mandatory. The investigator must resort to the Autopsy client plugin to start the machine, as the web interface is incompatible due to the dependency on the original forensic image.
Steps for Both Methods:
Initiate SSH Connection: An SSH link is established with the forensicVM server.
Reverse Connection Establishment: This connection triggers a reverse connection to a read-only samba CIFS share, often known as a Windows share. This maneuver enables the server to access the Windows share containing the forensic image.
Initiate Conversion: Here, the type of forensic image is identified, followed by the selection of an appropriate tool on the server to mount the image to a virtual raw device. This is especially vital when images span across multiple files.
Note
This tool selection process ensures that the appropriate software is utilized for optimal conversion.
Snapshot Creation: An initial forensic image snapshot is generated. Acting as a base snapshot, it retains the state tied to the forensic image’s virtual raw. This facilitates the installation of drivers without altering the forensic image’s state or information, preserving the sanctity of the evidence.
Image Conversion: The image undergoes a transformation into the qcow2 format - the favored format for KVM virtualization. It not only supports snapshots but also ensures the image only occupies the space used by the forensic image.
Partition Detection: The system identifies any partitions present within the image.
Operating System Detection: The OS inside each partition is discerned. If recognized, KVM-optimized virtual drivers get pre-installed, which will initiate upon the forensic virtual machine’s first boot.
Fallback Conversion: If the OS remains unidentified, the VM undergoes a full conversion without any driver installations. While this could potentially enable booting, post-conversion, manual scrutiny and possible KVM driver installations are essential.
Partition Absence Handling: In the event no partitions are identified, a virtual partition gets generated alongside a virtual boot device. This procedure aids in converting partition images into complete images. However, the user must invest additional effort to adapt this image for booting. They might need supplementary tools, like a virtual CD-ROM, to rectify and make the VM operational.
Tip
It’s crucial to regularly monitor the conversion process to ensure all steps are proceeding as expected and that any necessary adjustments can be made promptly.
Method 1: Copy the Local Forensic Image to a New Forensic Virtual Machine on the Server
Direct Copy to Server: This approach duplicates the forensic image, creating a new forensic virtual machine on the server. It grants comprehensive access and utility of the forensicVM, making it the ideal choice for collaborative remote investigations.
Conversion steps:
Begin the Conversion:
Initiate the conversion process by clicking on the button titled “Virtualize - a) Convert to VM”. This action sets the process in motion.
Upon clicking the conversion button, a popup alert appears. This alert will display the message: “The conversion will start in a command window. Please do not close it until the conversion is finished…”. Click on “OK” to commence the conversion process.
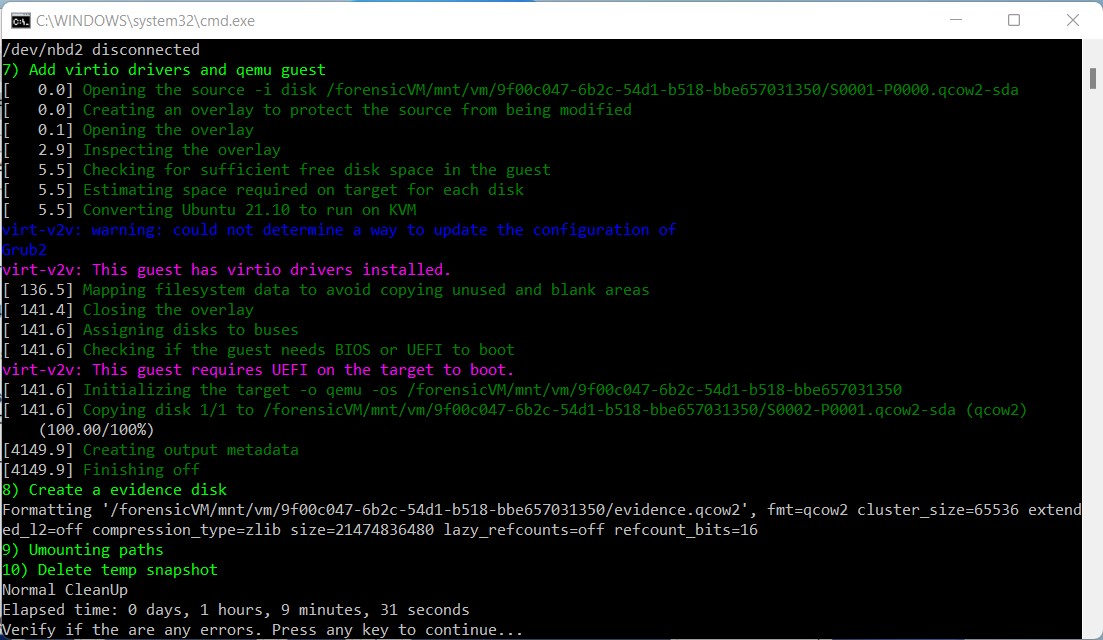
A MS-DOS command window materializes post confirmation. This window is instrumental in detecting the image format, which will be visibly printed within. Ensure to keep an eye out for messages color-coded in green, indicating successful steps. However, should there be any errors, take note for future reference.
During this phase, the system installs the required KVM drivers. Various messages get displayed in this window. Here’s a color code to understand them:
Green: Success messages.
Blue: Warnings.
Magenta: Special information messages.
Red: Error messages.
The conversion progression is displayed as a percentage.
Once the image conversion completes, a success popup will appear confirming the conversion’s successful completion.
Fig. 48 Screenshot of the success conversion popup.
ForensicVM First Boot:
To boot up the machine for the first time, click the “Start” button available in the Autopsy ForensicVM Plugin.
Fig. 49 Screenshot of the “Start” button on the Autopsy ForensicVM Plugin.
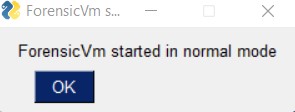
Informational Popup - Machine Started:
Post clicking the “Start” button, an informational popup will appear to inform you about the machine’s status.
Fig. 50 Screenshot of the informational popup after machine start.
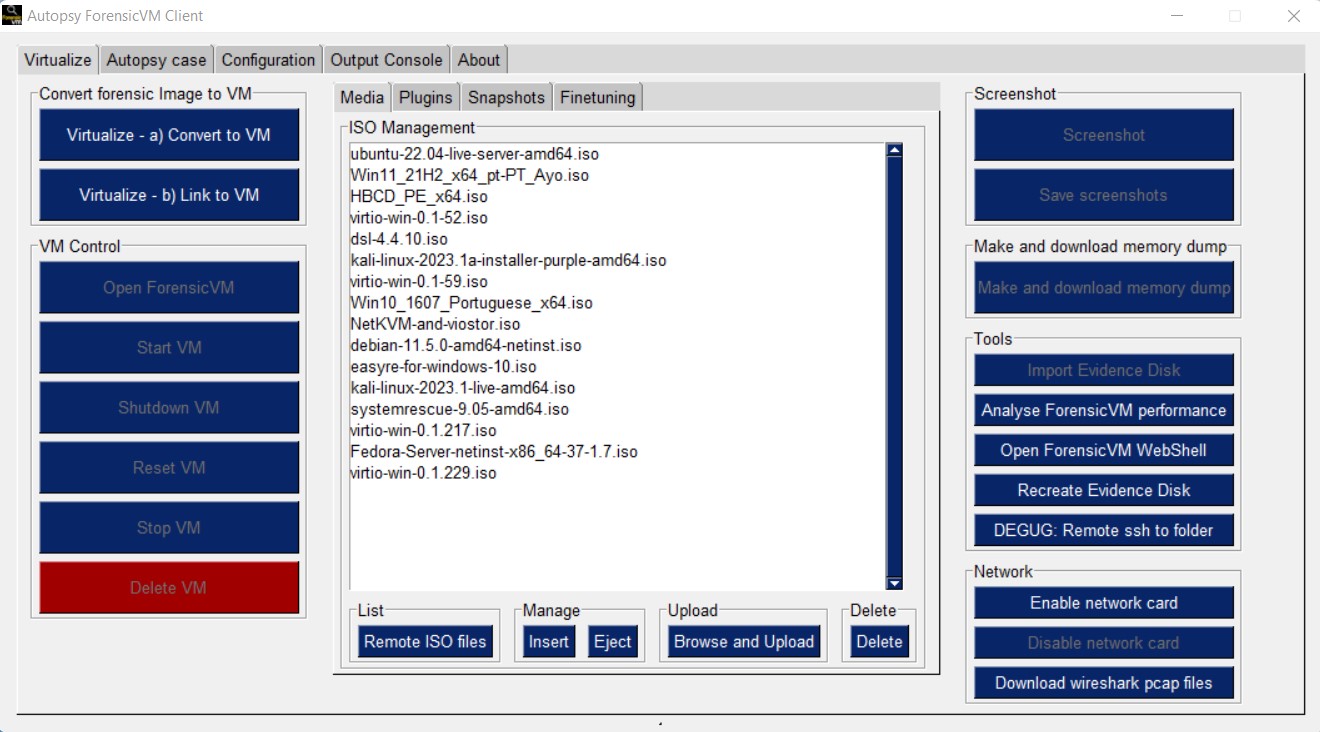
Opening the ForensicVM:
To access the ForensicVM’s web screen interface, click the “Open ForensicVM” button. This interface will allow you to interact directly with the forensicVM.
Fig. 51 Screenshot of the “Open ForensicVM” button.
ForensicVM Web Screen Interface:
Once inside the web screen interface, click the prominent “Connect / Start” button to establish a connection with the forensicVM and view its virtual screen monitor.
Fig. 52 Screenshot of the ForensicVM’s “Connect / Start” button.
Interact with the ForensicVM:
With the connection established, you can now freely interact with the forensicVM.
Fig. 53 Screenshot showcasing the ForensicVM’s interactive interface.
Method 2: Link the Local Forensic Image to a New Forensic Virtual Machine on the Server
Link Creation:
In this method, a link is forged between the local forensic image and a new counterpart on the server. This approach is faster because it doesn’t involve transferring the entire image to the remote server. However, there are some limitations. The conversion process and preview are swift, but starting the machine locally is a requirement. The investigator needs to use the Autopsy client plugin to initiate the machine since the web interface cannot be used due to its dependency on the original forensic image.
Conversion Steps:
Begin the Conversion:
Start the conversion by clicking on the button labeled “Virtualize - b) Link to VM”.
After activating the conversion, a popup will emerge. It will instruct: “The conversion will commence in a command window. Please refrain from shutting it until the process concludes.” Press “OK” to proceed.
The MS-DOS command window will surface, and the software will identify the image format, displaying it within the window. Successful actions are highlighted in green. However, be vigilant and record any errors that arise.